Friday, March 20, 2009

My Craft Space

Hey,

Someone was asking the other day about where I craft so thought I would do a post to show you my space.

I am very lucky in that we moved a year ago into a much bigger place when we had Baby G. The biggest bedroom became a spare room/craft room for me. We have one of those bunk beds with a double bed at the bottom, a single at the top, but the double folds up into a sofa so it doesnt take up much room. There is a TV, DVD, and most importantly my ipod dock in there so i can watch/sing as I craft.
We also have a set of two wardrobes. one is just a standard wardrobe, empty waiting for guests (well apart from my wedding dress anyway). The second looks exactly the same from outside but has been shelved out to store all my bits and pieces.


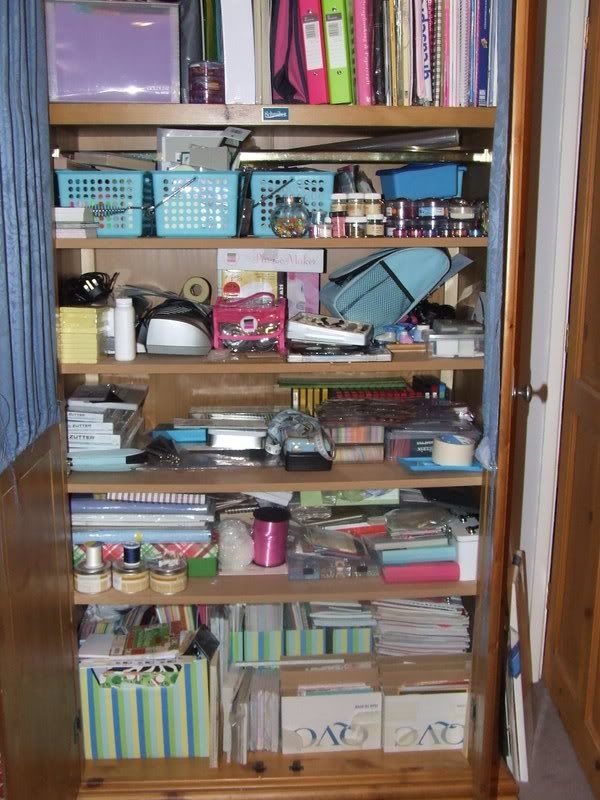
There is/was some sort of order of things in there but I have crafted since then and it all went to pot lol. A rough idea is

Very top - books, tote bags, things too big for anywhere else, the folders contain templates, project printouts and a sheet of trading card pockets to hold my acrylic stamps.
next shelf - the baskets hold ribbons, small stamps, general bits and pieces, the prima flower jars, brads and buttons etc are all here too
3rd shelf - This is the tool shelf - houses my craft robo, bind it all, scoring boards, cutting mats and trimmers etc. Also tools, punches and stuff
4th Shelf - Bia wires (still in boxes as i have never used the BIA yet!) sizzix and big shot dies, chipboard, other die cuts
5th shelf - "things to do" things to alter, projects to start, canvases, albums stuff like that. This shelf is rather full!
Bottom shelf - paper, paper, paper and a bit more paper - there are 8 paper holders, 8 made up from old QVC boxes which hold the smaller paper, and a stack of magazines which i keep meaning to go thru.

My desk is my pride and joy. I wanted something that was big enough to work on, but still have my laptop on, and room to store stuff. And its major point. I wanted it to be standing height. I have a bad back and sometimes its less painful to stand for things that it is to sit, so i wanted a desk that I had the option for. Just before christmas we went to the Range and found this 3 part desk. When folded it looks like a normal desk but it has a full size pull out extension which makes it L shaped, and a laptop/keyboard shelf too. At the moment the very top surface houses my big shot, a drawer unit that holds all my ink pads, a stationery holder with my basic tools in it, and loads of other crap that I havent moved, like photos and little cuddly cows (random but true!). I means when I need a little extra room I can pull out the extra arm.


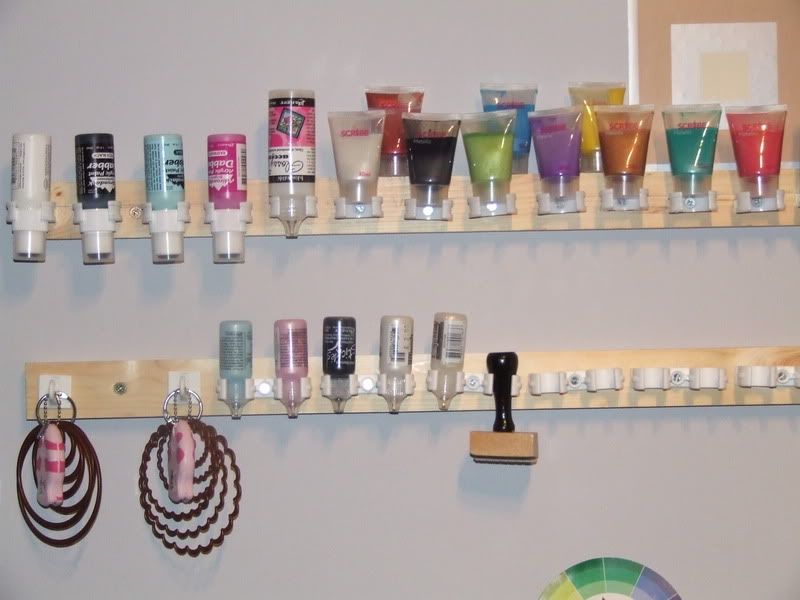
Also in the top pic you can see my special racks we made to hold my stickles, liquid pearls, acrylic paints etc. Its a block of wood with different sized plumbers pipe clips on it. The lids of the bottles fit into the clips and hold really securely. The stickles rack is a little empty but going to work on correcting that at harrogate next weekend. That rack also has a couple of hooks for my nestabilities and piercing bugs.


In the very corner, and not sure you can see is a 4 drawer plastic storage unit on wheels which holds a drawer full of pens and pencils etc, a drawer for paper scraps, a drawer for material, and one which holds everything else lol. on top of this is another one of the blue baskets like whats in the wardrobe. This holds all my new purchases - things get dumped in there when they are brought until one of 3 things happen - i use it, put it away, or finish just looking at it.

At the moment its still the same odd grey colour it was when we moved in but in the next few weeks its being painted a gorgeous sage green, with a dandelion clock wall decal - a bit like this one on Etsy

So there you go, its only little, but its mine and i love it!!!

Cos I'm a woman.....


W...O...M..A....N ! and yes I am singing that very loudly, and very badly! in fact J has just said "mummy please dont sing!" hmph! kids these days!


Anyhow, its my turn this week over on Daring card makers to set the dare. As us UK peeps will know this Sunday is mothers day, and in honour of that - and the fact on Sunday I am doing the 300 mile drive (with a 3 yr old and 1 yr old!!) to go and spend a well needed break at my mums down in Kent - this weeks dare is called WOMAN!


I want to see your cards, any colour, any theme, any products, as long as they are for a woman. Its also a perfect opportunity if you are like me and have left making a mothers day card till the last minute.


So have a go, check out the other cards from the team over at DCM, and dont forget to show us your creations.


I think you're amazing .. Mum! (Two variations)


This week I have made two cards, pretty much the same but with a little tweak (ooh that will be one for my mum and one for MIL then lol). I must admit before I show you them that I am not struck on the colour - but by time I had decided that, my printer had decided that it was going on strike and wouldnt print anything else, at all, ever, so there! Despite much shouting, swearing, banging (and a little bit of kicking) it wasnt going to play, so blue they shall be ...


I started by printing some gorgeous papers from Pink Petticoat (the Just Daisies and Sweet Flourishes, both in Airforce Blue - £1.99 for 52 colourways!!) onto some really nice heavyweight matt photo paper I am loving at the moment from Staples. I cut each piece into A5 , then folded to make a A6 card blank.


I then printed the "I think you're amazing" image (a freebie would you believe!!) again from the brilliant pink petticoat store (have had a little spree there the last couple of weeks!) onto plain white Cardstock and cut them out using my nestabilities (the scallop square and plain square) I coloured the image in and used a little stickles in Icicle to add a little bling. I inked the edges of the square cut birdie and mounted them onto the card blank using 3d foam. Then using the offcuts from making the card blank I used the scallop nestabilities to cut a shape (in hindsight a smaller scallop, or bigger circle may have looked better_. I also cut a circle which I inked. I then used Making Memories alphabet rub ons in "heidi" to add the word "MUM". All in all, pretty quick and simple, but I like them (even if I am not keen on the colour).


Am away next week but may blog depending on the net connection as I just got myself a cute little pink "dongle" which is supposed to let me log on from anywhere, but we shall see.


Till later guys xxxx